3D Point Cloud Generation using Photogrammetry
Point Cloud is Three Dimensional (3D) data represent physical object in a 3D coordinate system. Currently, the application of 3D point clouds are ranging from construction, surveying, asset management, digital city, and vegetation monitoring. Each area develop their own method to achieve the goals. The development of 3D point clouds have change the way we capture our environment and surrounding. But, how do we generate the 3D point cloud data?
There are different methods for 3D point cloud generation. In general, 3D point cloud data can be generated by using laser scanning, LiDAR (light detection and ranging), Time-of-Flight Cameras, and photogrammetry. For this article, we will discuss more about 3D point cloud generation using photogrammetry method.
What is Photogrammetry?
Photogrammetry is a technique used to obtain reliable measurements and 3D data by analyzing and interpreting 2D images. In this article, we will explain step by step to produce 3D point cloud data by using simple procedure. The steps including taking pictures from camera, generate point cloud using open-source 3D editor application Meshroom, and visualize the point cloud in open-source 3D application CloudCompare.
How to Generate 3D Point Cloud?
Photograph Collection
When preparing for photogrammetry, it’s crucial to capture a comprehensive and detailed set of photographs. Here’s a guide to ensure high-quality results:
1. Capture from Multiple Angles
- Number of Images: Take a large number of images, ranging from 20 to several hundred, depending on the complexity of the object or area. More images generally lead to better results.
- Camera Movement: Instead of rotating the object, move around it to capture different angles. Rotating the object can cause inconsistent lighting conditions, which may negatively affect the final model.
2. Consistent Camera Settings
- Configuration: Use the same camera settings for all images. Keep your camera orientation consistent (either all landscape or all portrait). Changing settings like zoom, ISO, or shutter speed between shots can introduce inconsistencies in exposure and focus, making it harder for the software to stitch the images together accurately.
3. Ensure Adequate Overlap
- Overlap Ratio: Aim for 60-80% overlap between consecutive images. This overlap is crucial for the photogrammetry software to identify and match features accurately across different images, leading to a more precise 3D model.
4. Focus and Clarity
- Image Sharpness: Ensure all images are sharp and free from motion blur. Clear, focused images are essential for accurate feature detection and reconstruction.
5. Optimal Lighting Conditions
- Lighting: Photograph the object or area in good lighting conditions. Avoid overly bright or dark environments, as extreme lighting can obscure details or create excessive shadows.
6. Minimize Shadows and Reflections
- Shadows and Reflections: Try to take images with minimal shadows and no reflections. Shadows can obscure details, and reflections can create false features or distort the object, complicating the reconstruction process.
Software Preparation
For this tutorial, we will use Meshroom software. It is free to use software to download. Other commonly used software for photogrammetry includes Agisoft Metashape, Pix4D, and RealityCapture.
1. Download Meshroom
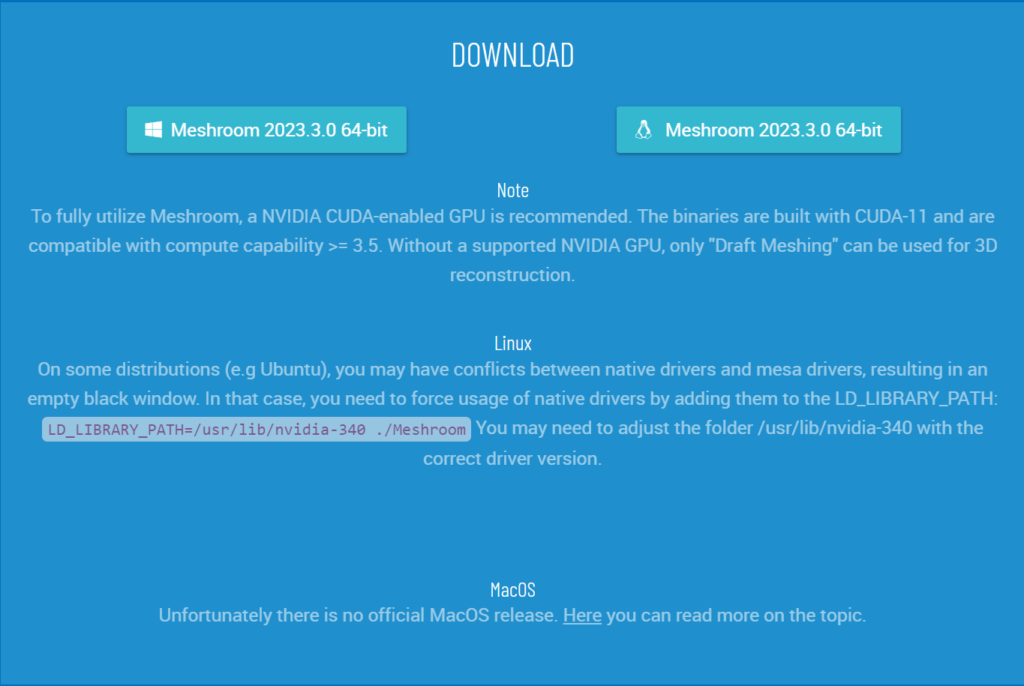
2. Open Meshroom
Extract the downloaded files and find ‘Meshroom exe’ file.
3. Save the file
First of all, don’t forget to save your file by using File >> save as
It is very important to keep track location of your meshroom files since the result will be generated automatically within the same folder of your meshroom file.
Processing with Meshroom
1. Load Images
Load the images into the meshroom software by using:
File >> import images. You can also drop image files from your computer to the ‘Image Gallery’
2. Start the Photogramettry Process
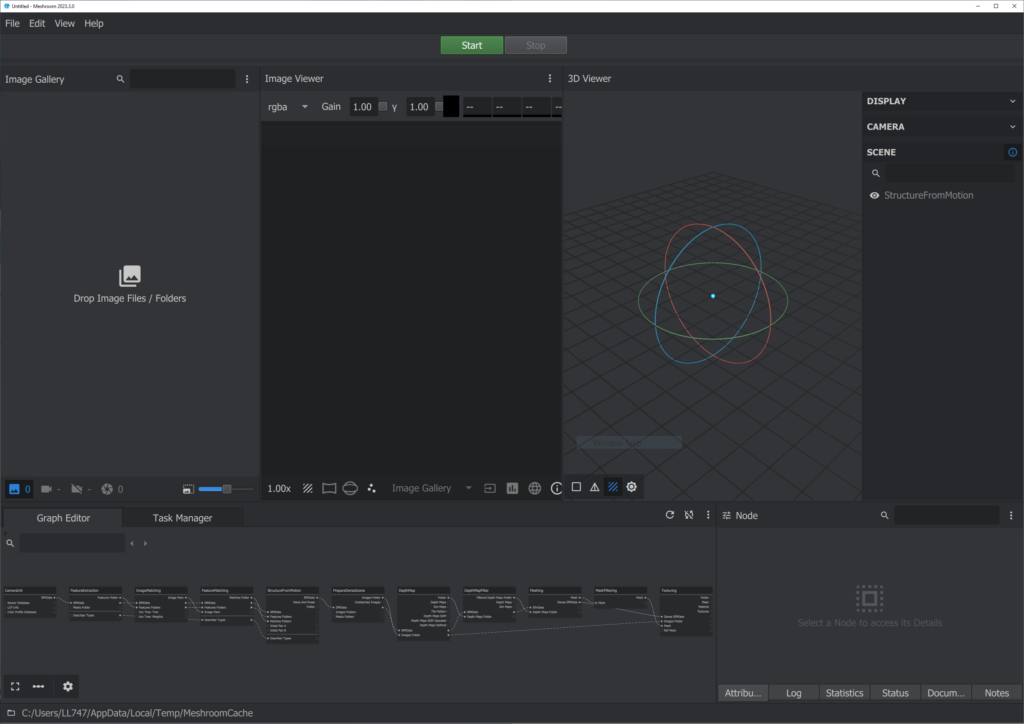
Click the “Start” button to run default photogrammetry process in meshroom. You can see the pipeline at the ‘Graph editor’. It is located bottom area of the dashboard. If you are experienced enough, you can change or customize the process by modifying the pipeline.
3. Processing
The software processes the images to detect and match features across the different photos. Initially, a sparse point cloud is created using the matched features. This provides a rough outline of the 3D structure. After that, the software refines the sparse point cloud to create a dense point cloud, which includes many more points and provides a detailed representation of the 3D structure.
4. Inspect the model
Once the 3D point cloud processing has been generated from meshroom, incpect the model to make sure it meets your expectations. You can see cameras around the 3D object that mimics the camera from your images.
Post-processing
The 3D model result can be seen at MeshroomCache folder that is created in the same folder as your file.
MeshroomChace >> Meshing >> (Name file, usually in number) >> mesh.obj
The dense point cloud can be further processed to create mesh models, texture maps, or other 3D representations, depending on the desired output. You can open the resulted file in other software such as cloudcompare, windows 3D viewer, or open3D in python.
Applications of 3D Point Clouds from Photogrammetry
- Topographic Mapping: Creating detailed maps and models of terrain.
- Architecture and Construction: Documenting and planning construction projects.
- Cultural Heritage: Preserving and studying historical sites and artifacts.
- Forestry: Analyzing vegetation and forest structure.
- Urban Planning: Planning and managing urban infrastructure.
Photogrammetry is a powerful and versatile technique for 3D point cloud generation. It can provide a detail and accurate 3D models from simple photographic images.
Category List
- 3D Point Cloud
- Artificial Intelligence
- Asset Management
- Digital Twin
- Featured
- Hardware
- Knowledge Graph
- LiDAR
- News
- Site Monitoring
- Vegetation Monitoring
- Virtual Reality
Recent Post
- Smart City Infrastructure Monitoring for Civil Engineers Using LiDAR and AI
- Digital Twin Integration for Road Networks Using LiDAR and AI
- Pavement Crack Detection using AI and LiDAR
- Pavement Defect Detection with GeoAI: Harnessing Laser Scanners and Profilers
- Asset Inventory Mapping with GeoAI: Complete Road Asset Capture Using Laser Scanning and Profiling